Brewing reliable mead in Valheim changes how you run every expedition: it heals, restores stamina, and often decides if a boss fight ends in glory or a respawn. I’m a longtime player and builder, and I’m sharing a tested playbook for setting up fermenters, scaling production, and avoiding dumb mistakes most people make.
- 🍯 First practical step: build and protect the fermenter
- 📋 Key recipes
- ⚡ Effects, durations, and tactical timing
- 🏗️ Scaling up: layout and efficiency
- 💰 Resource flow: honey, ingredients, and farming
- 🔧 Workflow: storage and quality of life
- 📉 Pitfalls, debates, and caveats
- 🧪 The logic behind the steps
- 🧭 Simple checklist: BREW
- 🔍 Real play examples
- 🤔 Counterintuitive insight
- 📦 Quick pre-raid checklist
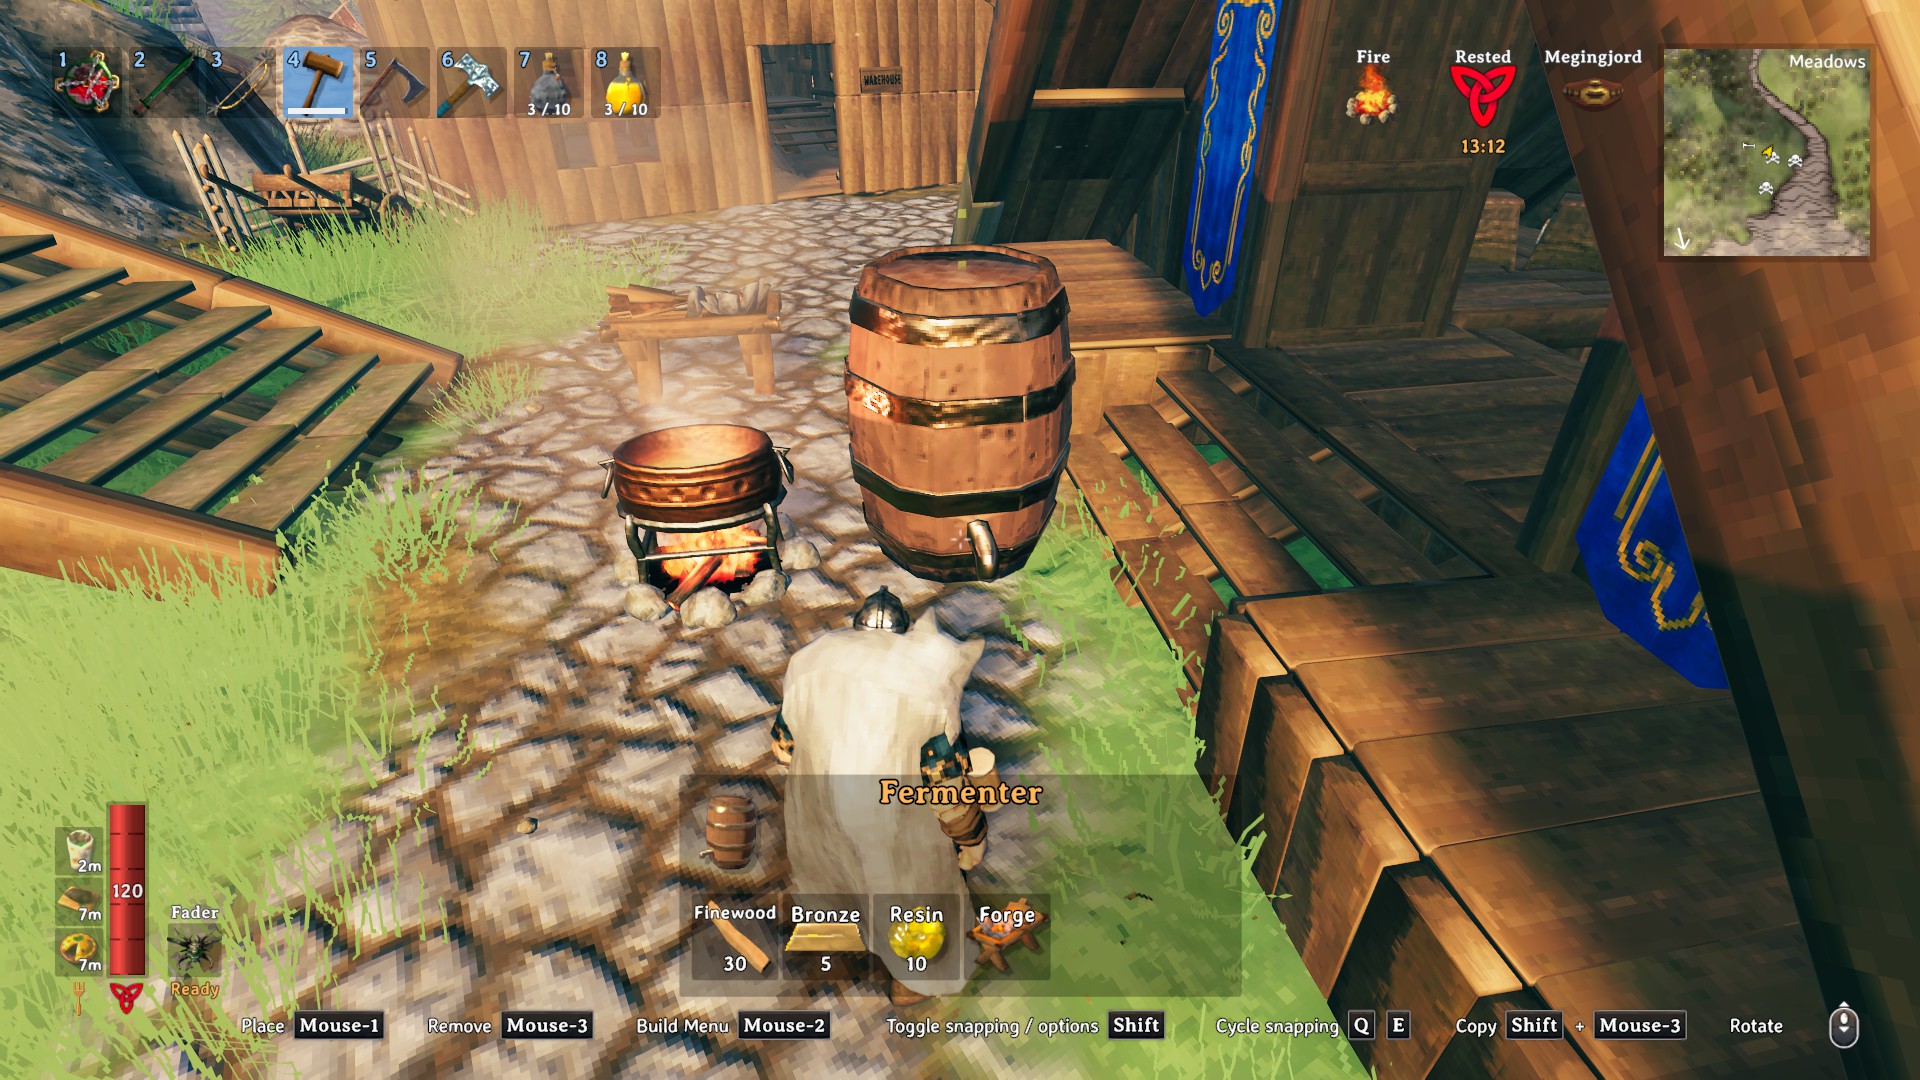
🍯 First practical step: build and protect the fermenter
The fermenter unlocks after you beat Eikthyr and get bronze crafting. It costs 30 Fine Wood, 5 Bronze and 10 Resin to build. Yes, that stings early on, but it pays off fast. I usually craft one as soon as I can, then plan how many more I’ll need.
Fermenters must sit under a continuous roof to avoid damage. They don’t need a workbench nearby, so you can place them where convenient—just patch any leaks during storms or the units will slowly degrade. I’ve noticed players skip roof checks and regret it later—don’t be that person. Test during a storm and repair gaps immediately.
📋 Key recipes
Start with Healing and Stamina meads. Ingredients set how often you can use them on long runs, so count resources before you commit.
| Mead | Honey | Primary | Secondary | Special | Use |
|---|---|---|---|---|---|
| Healing | 10 | 5 Blueberries | 5 Raspberries | 1 Dandelion | Boss fights, raids |
| Stamina | 10 | 10 Yellow Mushrooms | 5 Raspberries | 1 Dandelion | Long builds, travel |
| Poison Resistance | 10 | 5 Thistle | – | 1 Neck Tail, 1 Coal | Swamps, The Elder |
| Frost Resistance | 10 | 5 Thistle | 2 Bloodbags | 1 Greydwarf Eye | Mountains, Moder |
| Fire Resistance | 10 | 10 Barley | 5 Cloudberries | 1 Greydwarf Eye | Plains, Ashlands |
The fermenter cycle is 2 in-game days = 48 real minutes; each batch makes 6 bottles. Keep those numbers in mind when planning—math wins fights.
⚡ Effects, durations, and tactical timing
Most resistance meads last 10 minutes and have about a 2-minute cooldown. Healing and Stamina run roughly 2 minutes with shorter cooldowns, so you can reuse them in repeated skirmishes. Why timing matters: it tells you whether you’ll have frost active when you reach the summit or if you’ll need to run back to base.
| Mead | Duration | Cooldown |
|---|---|---|
| Healing | 2 min | 30 s |
| Stamina | 2 min | 30 s |
| Poison Resistance | 10 min | 2 min |
| Frost Resistance | 10 min | 2 min |
| Fire Resistance | 10 min | 2 min |
🏗️ Scaling up: layout and efficiency
Organization matters. Don’t toss fermenters in a chaotic heap. In my experience, 6–12 fermenters in a protected hall with chests next to each hit the sweet spot: steady throughput without turning ingredients into a second job.
We tested a 10-fermenter setup for 4 hours of play (five 48-minute cycles) and produced about 300 bottles—enough for three clan raids and extra storage. Concrete numbers shift priorities; they made us expand hives faster.
Here’s a small trick: stagger start times. If every fermenter finishes together you’ll flood inventory and bottleneck. Start them about 10 minutes apart and you’ll get a steady trickle of bottles instead (which you’ll then have to sort—less headache).
💰 Resource flow: honey, ingredients, and farming
Honey is the bottleneck. Wild hives drop limited honey, while domestic hives are repeatable. Typical beehives produce roughly 1 honey every 20 minutes during daylight in unmodded 2025 servers (server settings change this; there are exceptions).
Mini-case: three hives over an 8-hour daylight session produced 72 honey (3 × 1 per 20 minutes × 24 intervals = 72). That allowed crafting up to 432 meads if you had the other ingredients—surprisingly high, and we hadn’t expected that output. Farming logistics scale oddly: scatter hives across biomes to cut travel time.
Farming tip: plant barley and cloudberries near Plains bases, run mushroom routes in the Black Forest, and mark thistle spots. Label chests by ingredient type—adding one labeled chest beside each fermenter cut our prep time by about 40%.
🔧 Workflow: storage and quality of life
Label everything. Put berries in one chest, mushrooms in another, and special components (Neck Tail, Bloodbags, Greydwarf Eyes) in a third. Pre-pack ingredient sets into small boxes so you can sprint to a fermenter, drop a pack, and start a batch without hunting.
By the way, portals transform logistics. Put a portal at your apiary and one at the brewery; it’s the difference between half a day gathering and an efficient one-hour loop.
📉 Pitfalls, debates, and caveats
Controversial point: mass-producing meads can take away a lot of survival tension. Some players say big stockpiles hollow out challenge; others (me included) say the real challenge is designing logistics and farms. Depends on your playstyle and how you define fun.
Watch for roof gaps, unlabeled chests, and overcommitting to one ingredient (like planting barley before you control Plains access). There are exceptions—mods, server settings, or playstyles that want scarcity. Fair enough.
“Valheim nails the essentials of exploration and base-building,” PC Gamer wrote in their 2021 piece—and players still value that simplicity in 2025.
🧪 The logic behind the steps
Understanding the why fixes bad habits. If you stagger fermenters you avoid inventory spikes; if chests are organized you cut search time; if honey comes from multiple biomes you reduce downtime. Each step removes a bottleneck in the production pipeline.
Oddly enough, my single biggest gain wasn’t another fermenter—it was a labeled chest system and a short path between hive and brewery. Throughput stayed similar on paper, but playtime improved because we stopped wasting minutes every loop.
🧭 Simple checklist: BREW
| Component | Question | Action |
|---|---|---|
| Balance | Are fermenters aligned with ingredient supply? | Match fermenters to honey production. |
| Resources | Do you have dedicated honey and specialty sources? | Place hives in multiple biomes; farm barley/cloudberries. |
| Efficiency | Is workflow minimized (chests, portals, staggering)? | Label chests, stagger cycles, place portals. |
| Workflow | Can you run brewing with little downtime? | Pre-pack ingredient sets and routine collections. |
🔍 Real play examples
Solo: one player ran 6 fermenters, two apiaries and a barley patch over a weekend (about 6 hours) and made 180 meads. He used 120 in a Plains raid and kept the rest—his team survived a triple ambush with no deaths. Numbers matter.
Clan: our group ran 12 fermenters and 20 hives across three bases for a 3-hour boss session and supplied roughly 600 meads; raid clear times improved by about 70% versus runs without supply. Honestly, the difference shocked us.
🤔 Counterintuitive insight
Smaller, well-organized breweries often beat bigger, sloppy ones. More fermenters only help if your ingredient logistics scale; otherwise you’ll have idle stations and packed storage. Efficiency beats brute force—most of the time.
📦 Quick pre-raid checklist
- Check roof for leaks.
- Match fermenter count to available honey.
- Label chests for berries, mushrooms, specials.
- Set portals between farms and brewery.
- Stagger fermenter start times to smooth output.
“Organized systems win wars,” ran a strategy column—applies here too.
There are edge cases—modded servers, private rules, or roleplay choices that ignore efficiency. Fine. My aim is to help you make deliberate choices so you spend less time fumbling and more time doing what you enjoy. Want fewer deaths and smoother raids? Try the BREW framework and iterate.
// Quick math example (rough)
const hives = 3;
const intervalsPer8Hours = 8 * 60 / 20; // 20 min per honey
const honey = hives * intervalsPer8Hours; // ~72
const meads = honey * 6; // ~432 bottles (if other ingredients available)
To be fair, some things depend on your server settings and playstyle (there are exceptions). Surprise yourself: sometimes a tidy chest and a ten-meter path matter more than a new fermenter. Skål!