I play Crusader a lot, and I wrote this guide because the Grapple build is my go-to for solo dungeon farming, bounties, and tackling content alone. I’ve noticed it combines mobility with control in a way few other builds do. Honest advice from a woman who’s logged hundreds of hours: this works, and here’s why.
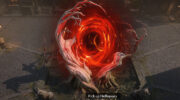
Why Grapple? Draw and Quarter hooks enemies and drags them into your damage—think of it like a lasso that brings the fight to you. Between us, that single mechanic changes how you move through maps. You dictate where fights happen; the enemies don’t.
⚔️ Quick Build Summary
The core is Draw and Quarter for pull + damage. Add Consecration for a damage zone and Shield Glare for crowd control. Spinning Shield helps reposition. I prefer Wrath of Heaven for burst against elites, though Sacred Fire can be better for very dense trash clears (depends on your route).
Short take: mobility + control + survivability. It’s not pure tanking and it won’t replace a coordinated group in every scenario. This doesn’t always work in super-tight boss arenas, though it shines in open maps.
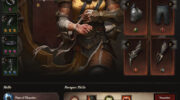
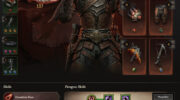
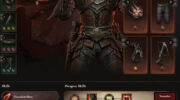
Recommended Loadout (compact)
| Slot | Ability | Role |
|---|---|---|
| Primary | Draw and Quarter | Hook, main damage |
| Secondary | Consecration | Damage corridor |
| Secondary | Shield Glare | Disable + mitigation |
| Secondary | Spinning Shield | Mobility + finish |
| Ultimate | Wrath of Heaven | Burst vs elites |
🎯 Why these skills (explanation)
I’ll explain why: Draw and Quarter creates grouping, which multiplies the value of area damage and gems that scale with hits. Consecration forces enemies to take that damage repeatedly while you drag them—so you’re not just moving targets, you’re routing them through harm. Shield Glare reduces incoming damage and makes elite fights manageable. Spinning Shield gives a safety valve for bad positioning. If you don’t understand why, practice the sequence in a low-risk map—feel it.
Skill rotation — example
// Basic loop (easy to remember)
Shield Glare -> Draw and Quarter -> Consecration -> Drag through consecration -> Spinning Shield if needed
Try variations. Want faster clear? Skip the ultimate on trash and save it for elites. Why? You keep momentum and avoid wasting the cooldown.
📊 Gear and Stats (practical)
Primary stat: Strength. Secondary: Vitality. After that, focus on cooldown reduction and movement speed—these scale directly with how often you can pull and relocate. Honestly, crits feel good but they don’t replace Draw-and-Quarter bonuses.
| Category | Target stats |
|---|---|
| Damage | Skill Damage, Draw and Quarter boosts |
| Utility | Cooldown Reduction, Movement Speed |
| Survival | Life on Hit, Damage Reduction |
Tip: prioritize items that specifically buff Draw and Quarter over generic DPS increases. Why? A +15% Draw damage often outscales a vague +30% weapon stat when your playstyle hinges on that one skill.
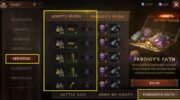
💎 Gems — priority and why
Gems matter more here than in some other builds. We found Berserker’s Eye gives raw damage that spikes during chained pulls, and Blood-Soaked Jade helps keep you alive because it scales with movement (very relevant for a grappling playstyle). I’ll be controversial: Bottled Hope is overrated for some routes; it feels great but doesn’t replace a well-ranked Jade on survival runs.
| Tier | Gem | Role |
|---|---|---|
| 1 | Berserker’s Eye 🔥 | Core damage |
| 1 | Blood-Soaked Jade 🩸 | Movement-based survivability |
| 2 | Bottled Hope ✨ | Utility / speed (situational) |
Gem ranks: pump Berserker’s Eye early (ranks 1–3), then push Jade. Why that order? You need the damage to clear elites fast; Jade keeps you alive while you do it. There are exceptions, of course.
🔧 Advanced tactics and positioning
Here’s the funny part: the map matters more than your gear sometimes. Route planning saves hours. I map a path that hits two elite spawns then loops back—efficient spawns = better drops. Use walls and terrain when you drag enemies; wall-dragging amplifies damage because enemies bunch up and you can sweep them faster.
“If you can bring three packs into one corridor, do it—you’re trading movement for concentrated damage.” — practical advice from my runs
Advanced trick (counterintuitive): sometimes you want less cooldown reduction. Wait—hear me out. If you overstack CDR you may end up with abilities that overlap and interrupt your pulling rhythm. A balanced CDR lets you time pulls so Consecration and Wrath hit perfectly aligned windows.
Common mistakes
- Chasing every single enemy—waste of time.
- Overextending without an escape—death is expensive.
- Ignoring equipment repair during long sessions—learned that the hard way.
📈 Progression and upgrade plan
Level plan in plain terms (quick):
- Levels 1–35: get core skills and basic gear; learn rotations.
- Levels 35–60: farm first legendary gems and begin set pieces.
- 60+: optimize gems, paragon, and perfect stat rolls.
Resource priority: Draw and Quarter upgrades first, then Berserker’s Eye, then Jade. Why? You need the tool to work (skill), the punch to scale (gem), then the sustain to repeat runs (Jade).
⏱ Time-saving checklist
| Before run | During | After |
|---|---|---|
| Repair gear, stock potions | Prioritize elites, efficient pull patterns | Salvage, upgrade gems |
Short reminder: take breaks. Fatigue makes you sloppy—bad pulls, worse deaths. To be fair, everyone burns out if they grind nonstop.
Final notes (real talk)
I’ve played this build across many seasons. We found it excels for solo play and for fast farming. Does it work in every situation? No. It will struggle in tiny boss arenas and some group strategies where a pure support tank is preferred. That’s a trade-off I accept—because I like moving and deciding where fights happen.
One last tip: practice the rhythm of pull → zone → reposition. It’s like learning to dance with monsters. Keep experimenting, and tweak gems and gear for the maps you run most. If you want, send me a short clip of your route and I’ll point out two quick improvements (I will—no fluff).
Happy hunting! 🎯