The Adamantine Forge sits in Grymforge, deep in the Underdark, and it lets you craft a handful of powerful items if you have Mithral Ore and the right molds. I’ve spent dozens of hours down there—honestly, it’s one of my favorite Act 1 rewards. You’ll want to know where every mold is before you light the forge, because using it can trigger a tough fight (prepare accordingly).
🔍 Quick facts
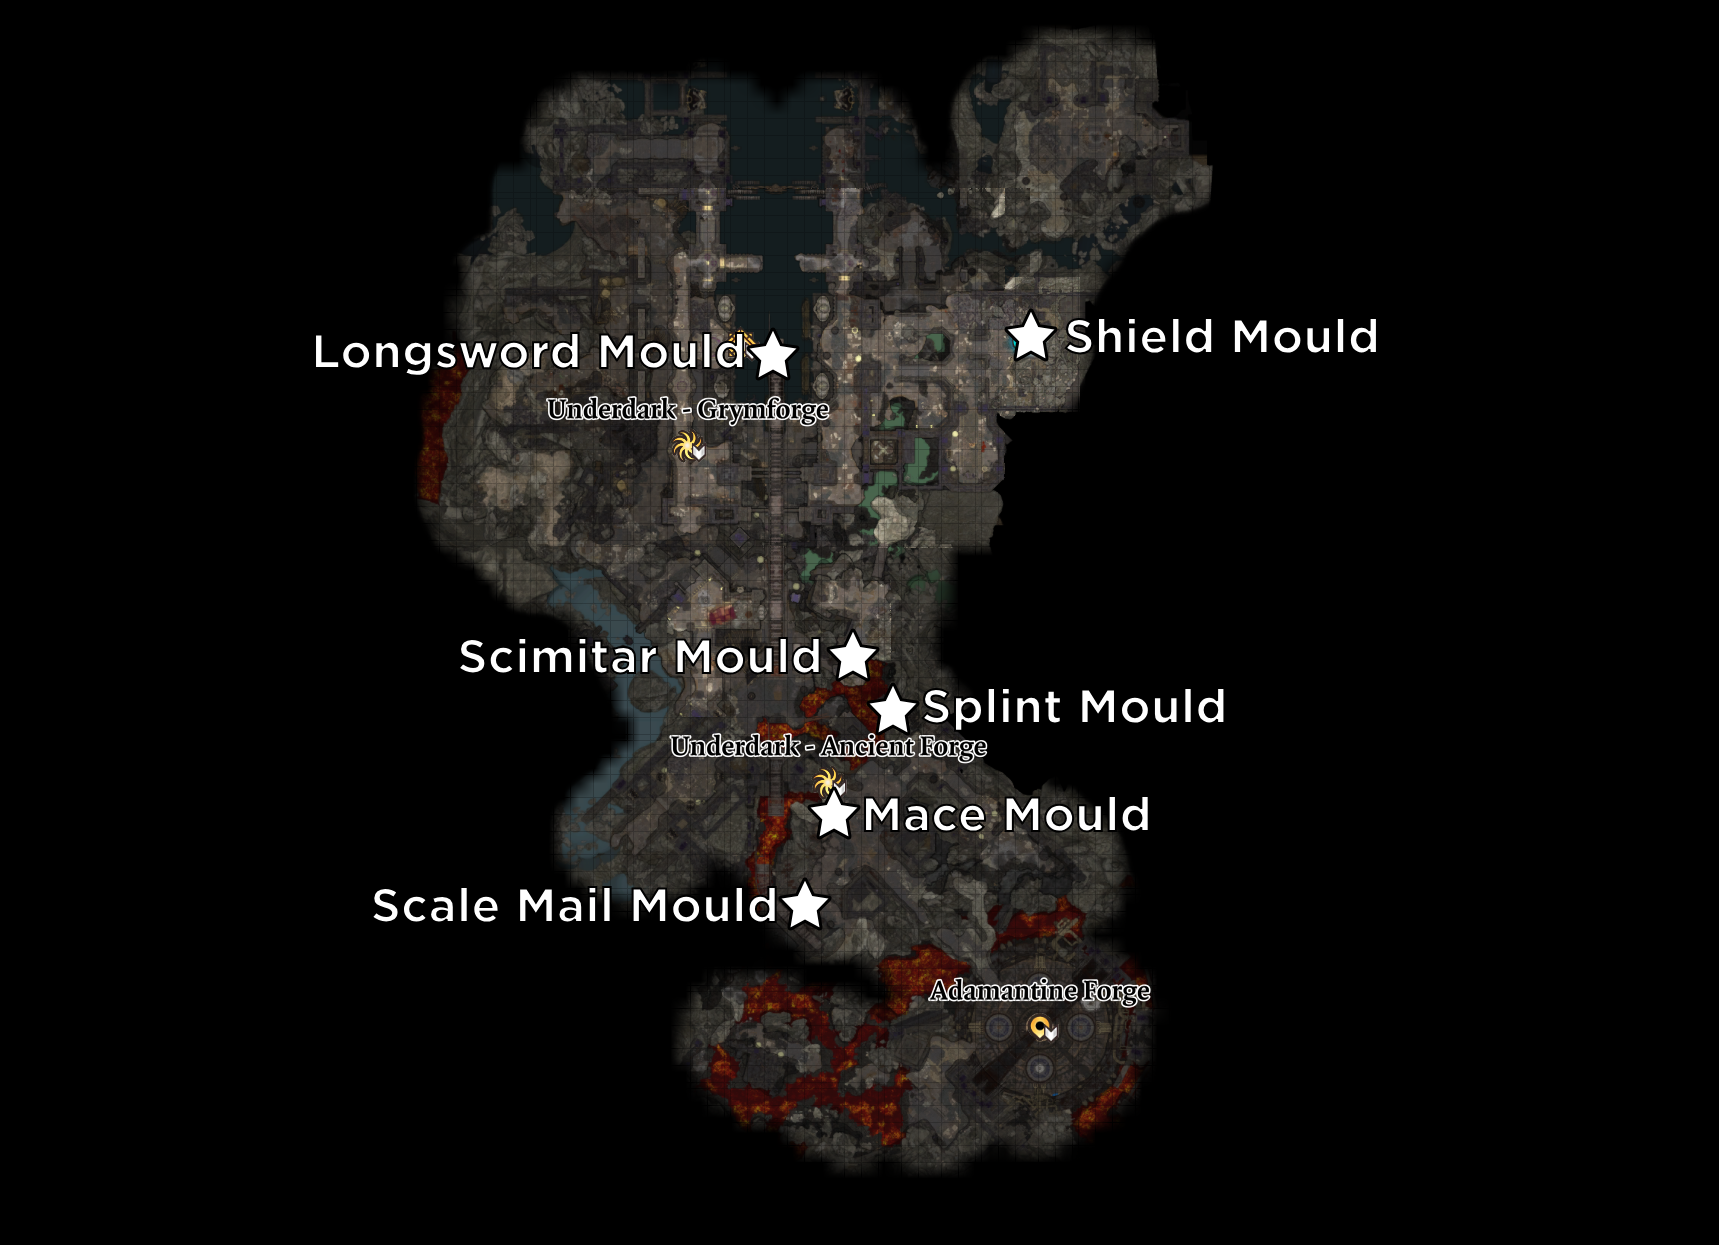
There are six molds around Grymforge that create: Longsword, Scimitar, Shield, Splint Armor, Scale Mail, and Mace. These molds are permanent—grab one and you can use it repeatedly. In my experience, party level 5–6 handles the area best (this doesn’t always work if you play very stealthy or pacifist).
Where the molds tend to be (short map)
| Mold | Area | Approx. coords | Hazard |
|---|---|---|---|
| Longsword | Central Grymforge, upper platform | X: -626, Y: 405 (approx.) | Animated Armor |
| Shield | North, secret room | X: -642, Y: 360 (approx.) | Poison gas |
| Splint | Southwest, alcove | X: -597, Y: 309 (approx.) | Heat / lava |
| Scimitar | East ruins | X: -607, Y: 371 (approx.) | Animated Armor resistances |
| Scale Mail | South, rotating platforms | X: -621, Y: 280 (approx.) | Timing / fire |
| Mace | Northeast upper platforms | (upper ledge) | Falls / patrols |
These coordinates are approximate in-game markers (they can feel off by a few steps depending on your save and mods). Really: use them as a breadcrumb, not gospel.
How I collect them (practical route)
- Activate Grymforge waypoint.
- Head north for Shield, then aim northeast for the Mace.
- Circle east to the Scimitar, then go south for Scale Mail.
- Work southwest to Splint, finish west at the Longsword, return to the Adamantine Forge.
Why this order? You avoid the lava-heavy zones until you’re ready, and you gather levers and shortcuts that make later passes trivial. We found that unlocking platforms early saves time—trust me on this.
Key tactics and why they work
- Bring magical weapons or spells: Animated Armor resists nonmagical hits, so nonmagical builds won’t last.
- Fire resistance matters near lava; otherwise your healer will be burned out fast.
- Perception and Athletics help—some buttons and climbs are easy to miss (I missed one on my first run, oops).
“Don’t rush the forge—prepare or you’ll regret it,” — advice I’ve given to friends more than once.
Rhetorical: Want the best shield early? Go for the northern secret room. Seriously, it changes fights. There’s controversy here: some players think using the forge early makes the game too easy. I disagree—sometimes it makes sessions dull, sometimes it’s smart resource management. Depends on your approach.
Environmental notes and traps
Watch for poison gas chambers and timed platforms. The elevator to the Adamantine Forge runs only after you find the lever (that lever can come from a corpse or be bought from a Duergar if you kept good relations). By the way, bribing or sneaking past Duergar can save a nasty battle—between us, I prefer it when I’m trying to speedrun loot.
Warning: using the forge can trigger a boss fight. Prepare healing, fire resistance and crowd control spells. This will be obvious once you interact with the anvil, but still—don’t walk in empty-handed.
Practical crafting tip
// example: what you need at the forge
ForgeItem("Longsword", MithralOre);
Bring one Mithral Ore per item you want to craft. Why? The forge consumes the ore; the molds are reusable but the ore isn’t. That’s why conserving Mithral matters.
Combat and puzzle specifics
The Scimitar spot needs an athletics climb (or Leap-type spells). The Scale Mail platform only appears safe when lava drops—timing is crucial. Honestly, if you like timing puzzles this one’s fun; if not, bring fireproof potions. Small detail: Animated Armors often trigger from pressure or proximity—don’t wander in alone.
One counterintuitive insight
Making gear too early can hurt your loot progression—some regular drops stop feeling useful. It’s like pruning a tree: you get immediate fruit, but you might stunt later growth. So think: do you want short-term power or long-term variety?
Final quick checklist
- Mithral Ore (one per item).
- Fire resistance and potions.
- Magical weapons or spells.
- Perception/Athletics party members.
Okay—go find the molds, but don’t rush. I’ve noticed players who map the area thoroughly come back to the forge three or four times; that’s normal. One last oddity: sometimes loot respawns differently after major story beats (patches in 2025 adjusted some spawn behavior), so if something’s missing, check your patch notes or a new save. Good luck—may your forge be productive and your party live to tell the tale!