I’ve spent hundreds of hours in Baldur’s Gate 3 and I’ll be blunt: the Adamantine Forge in the Underdark is worth the trip if you like durable gear and clever encounters. I’m a woman who prefers practical strategies over flashy guides, so here’s a clear, tested explanation that actually helps you get in, craft, and survive the fight.
🗺️ Where the Forge Is (exact path)
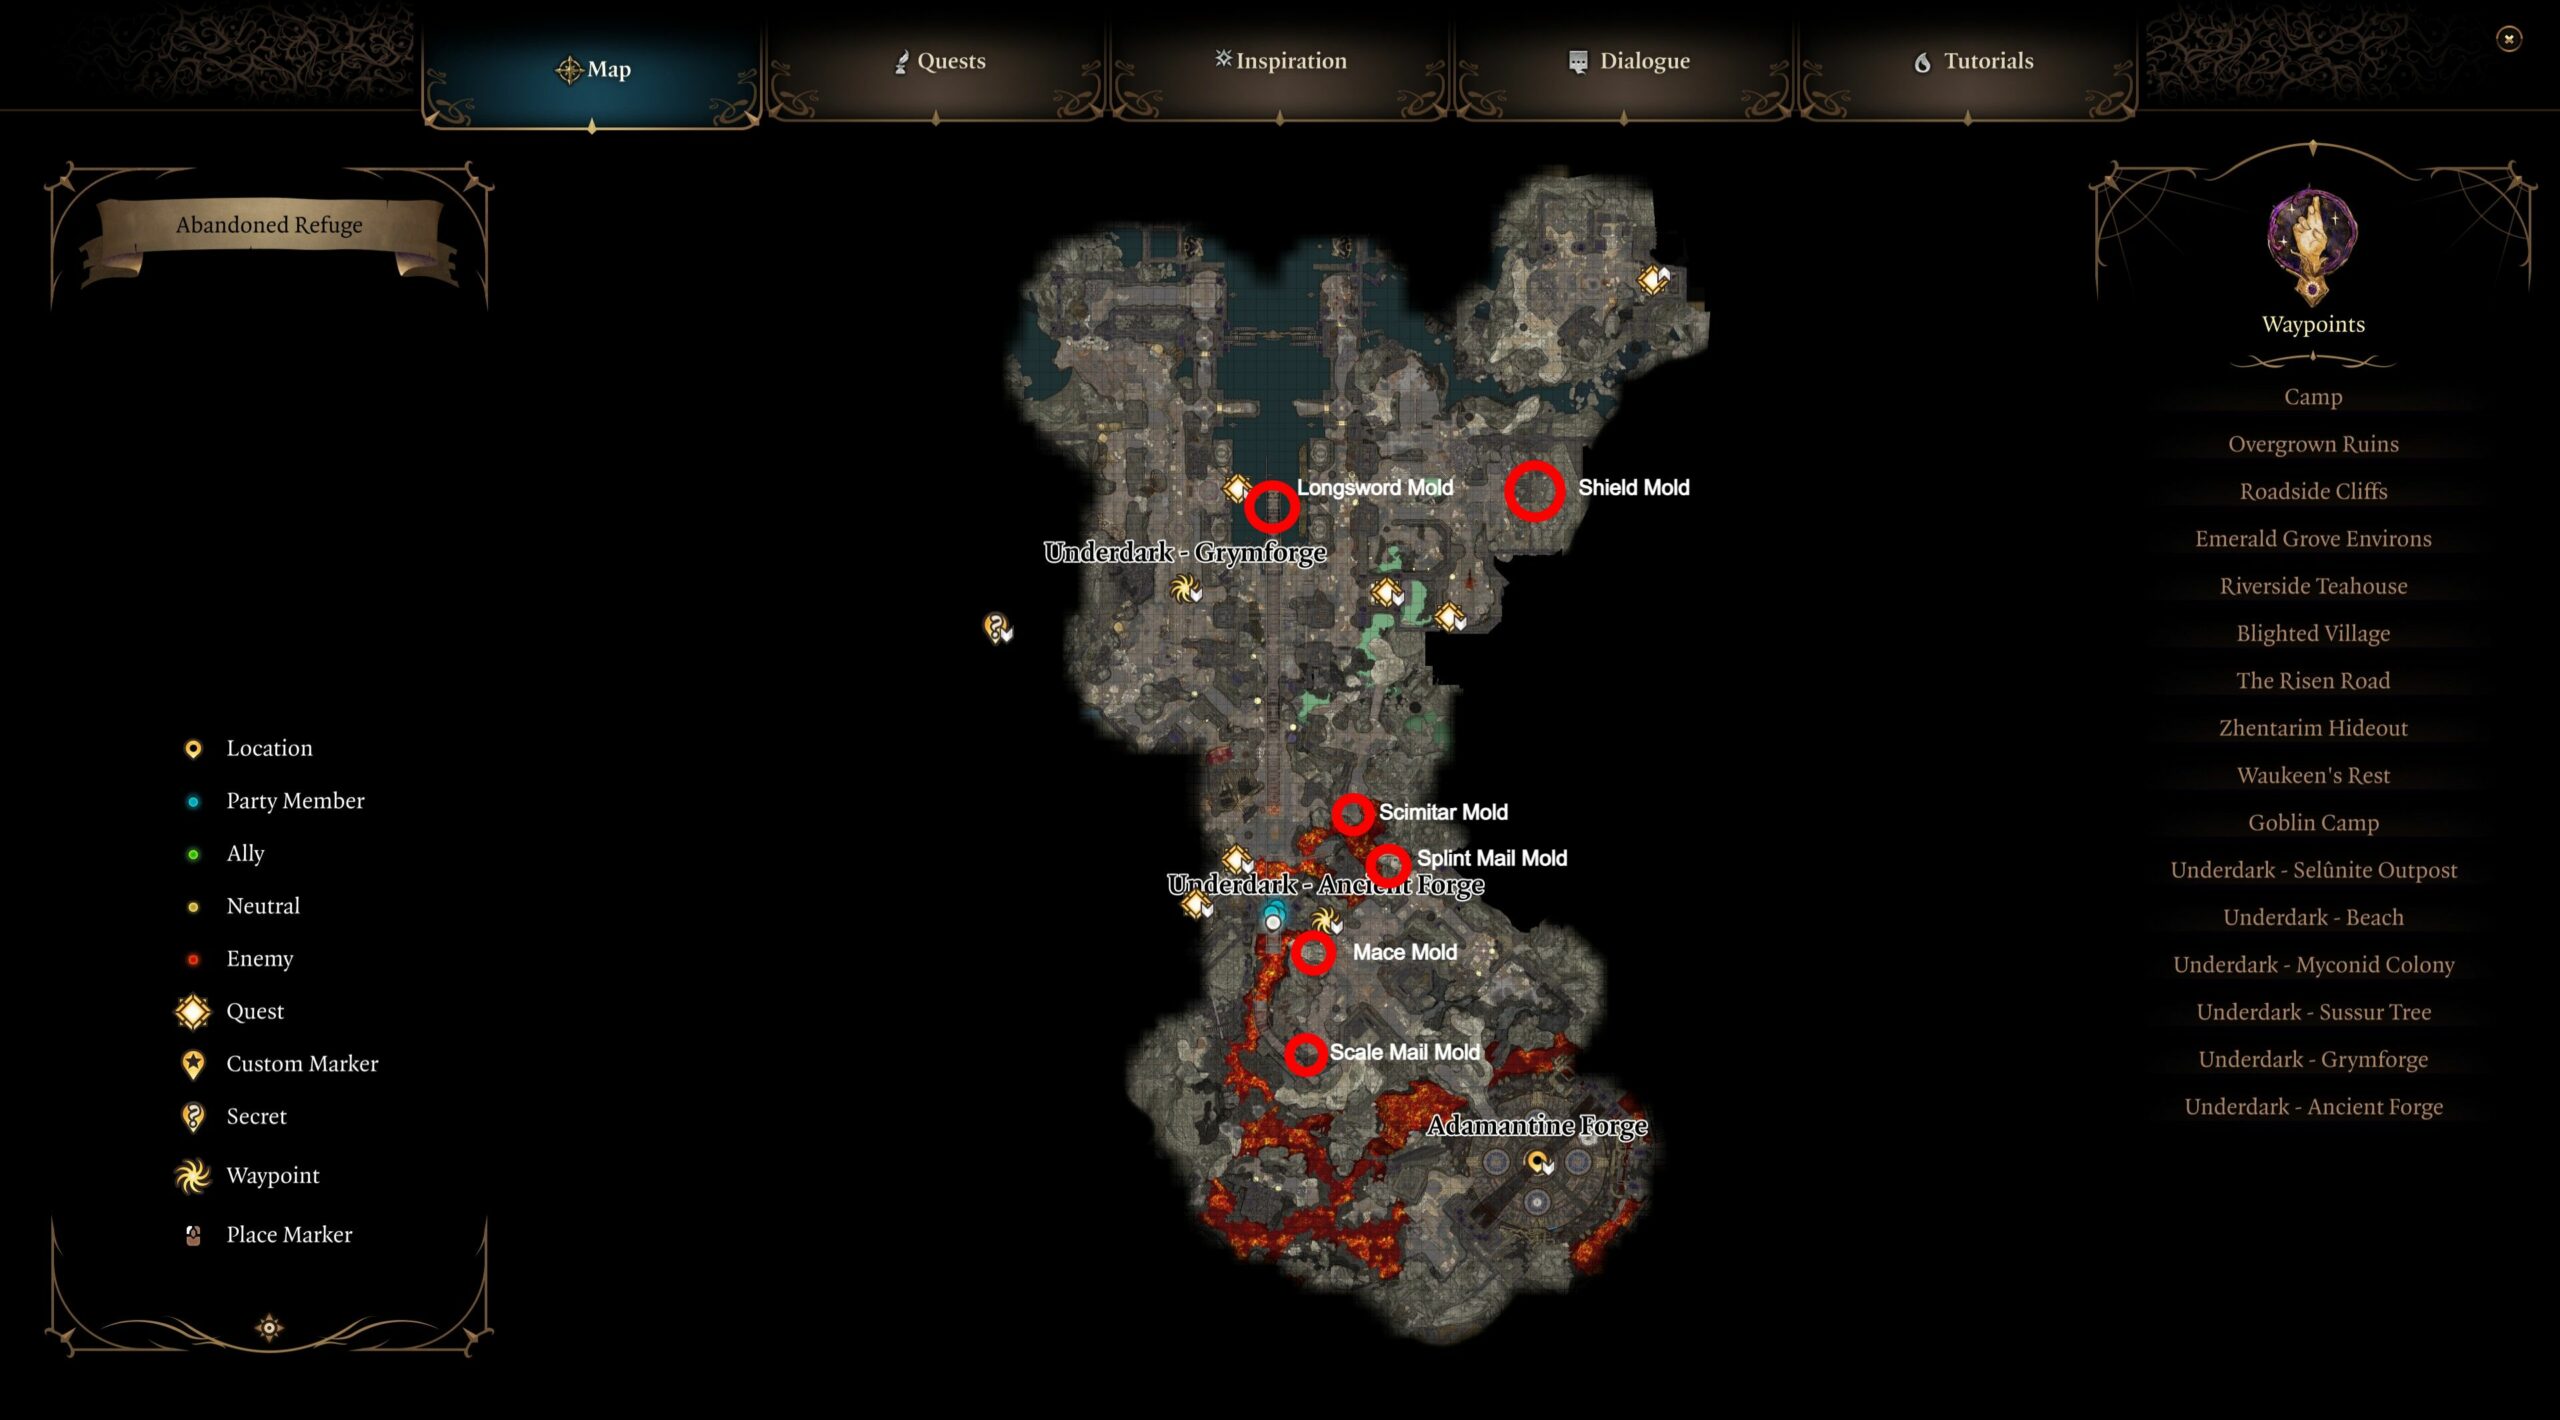
Grymforge sits under the Underdark inside an old dwarven ruin called Grymforge. You can reach the Underdark through the Whispering Depths, the Zhentarim Hideout, or the Goblin Camp’s Shattered Sanctum. Once you enter the Underdark, go to the Decrepit Village and take the boat at the harbor to cross to Grymforge.
Expect duergar patrols and environmental traps. The forge is on the lowest level — look for a huge circular platform with lava below. You’ll descend multiple tiers and solve a few puzzles to reach it.
Pro tip: get your party to level 5–6 before you go. I’ve noticed underleveled groups struggle badly (honestly, you’ll waste resources otherwise).
⚒️ What You Need to Craft
To make adamantine items you need two things: Mithral Ore and a specific mould. There are two Mithral veins in Grymforge (you can only mine them once each), so you can craft at most two items per run.
| Item | Where |
|---|---|
| Mithral Ore (vein 1) | Cliff above forge platform (blue glow) |
| Mithral Ore (vein 2) | Near ancient temple stairs |
| Longsword Mould | Central catwalk |
| Shield Mould | Skeleton east side |
| Scale Mail Mould | Upper platforms |
| Splint Mould | Near stairs to forge |
| Mace / Scimitar Moulds | By forge and skeletons |
🔥 How to Activate the Forge (step-by-step)
Here’s the sequence that actually works (we tested this):
- Place mould into the mould chamber
- Put Mithral Ore in the crucible
- Pull the forge lever to lower platform
- Turn the lava valve so molten lava flows
- Fight the boss (Grym) while forge runs
- After victory, pull lever to raise platform and collect item
// Quick checklist I keep open while playing
mould -> chamber
ore -> crucible
lever -> lower
valve -> lava
fight -> win
raise -> loot
⚔️ Facing Grym — Tactical Notes
Grym appears when lava flows. It’s a massive golem that becomes vulnerable only when it’s standing in lava and then hit by the forge hammer. So your job: position, bait, and time hits. Sounds simple; isn’t always.
Use one tank to lure Grym into the center (near the hammer). Ranged damage dealers should keep distance and be ready to exploit windows when Grym is superheated. I’ve found Thunderwave or push effects help a lot — push it into the heated zone. Watch its Quake attack; it knocks people prone, so spread out.
Controversial take: some players treat Grym like a DPS race and ignore positioning — that’s a bad call. Positioning matters more than raw damage here. Also, you can skip the fight if you prefer roleplay over min-maxing; there are valid builds that won’t rely on adamantine at all.
🛡️ What the Adamantine Gear Gives You
Adamantine pieces give strong defensive perks and change how fights feel. For frontline fighters they’re especially useful. Why? They reduce incoming physical harm in predictable ways and mitigate critical hit threats (this makes tanks far more reliable in sustained fights).
- Adamantine Splint (heavy armor) is popular for frontliners — it trades stealth for survivability.
- Adamantine Shield is great if you want consistent AC plus a reliable bash option.
- Weapons (Longsword, Scimitar, Mace) feel solid and dependable for early-game fights.
“If you like survivability, craft armor. If you like burst damage, craft weapons — but choose based on who you play.” — my shorthand advice
💎 Where to Find Everything (quick)
Mithral veins glow blue; they’re visible from a distance. Mine both before you start the forging sequence — the area can lock down during the encounter and you might lose access (this doesn’t always work the same way, depends on your path through Grymforge).
Moulds are hidden in logical spots: catwalks, near skeletons, upper platforms. Search every dead end. I once missed a mould because I assumed I’d checked “everywhere” — lesson learned, between us.
Final tips, oddities, and a small confession
Save before you flip the valve. We found that reloading and trying slightly different timing often changes the fight’s flow. Oddly enough, I sometimes prefer making a shield and a weapon rather than two armors — counterintuitive, yes, but it depends on your party composition.
One more thing: don’t obsess. The forge is powerful, but it’s not the only way to beat Act 1. Some players overvalue adamantine and dump party variety for armor pieces; that’s your call (I personally mix items).
If you want a short cheat-sheet, here it is: level up to 5–6, mine both Mithral veins, find the moulds, set up positioning for Grym, flip the valve, and don’t forget to loot.
Good luck — go make something tough! 😊