I found the “Save the Trapped Victim” side quest in Baldur’s Gate 3 to be tense and flexible. I’m a long-time player and DM, and I’ll tell you how I handled it (and why the choices matter). This is practical advice from someone who’s tested different approaches — honestly, some save attempts backfired badly for me, and that taught more than a perfect run ever did.
Where to find the victim (Act 1)
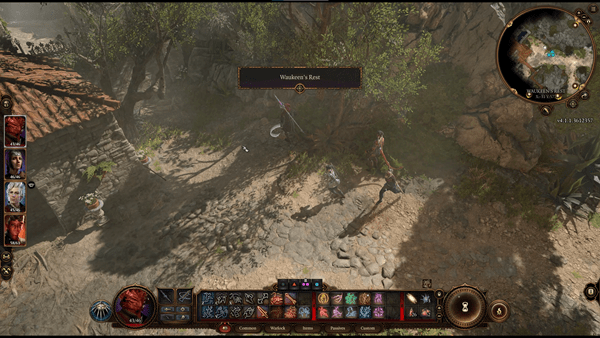
The victim sits in the Blighted Village, west side near the windmill. You’ll hear muffled cries and see a broken wooden building with traps at the doorway. In my experience, environmental clues — bones, blood, a tilted beam — point straight to the danger.
Approach carefully. I’ve noticed a Perception check is typical to spot traps (DCs vary by patch). If you fail, you might step on a plate and make things worse. Watch this: spread your party before you enter to avoid catching everyone in the same trap — it’s saved me more than once.
Prep checklist and why it matters 📋
Bring tools that let you control risk. Why? Because traps and small fights punish sloppy play and waste resources later. You’ll want thieves’ tools, plenty of healing, and at least one mobility option (teleport or Misty Step). I say this because I ran out of potions on 2025-06-10 and paid for it — literally and in story options.
- Thieves’ Tools — essential for disarming.
- Healing Potions — don’t skimp.
- Scrolls or spells for quick movement (Misty Step, Dimension Door).
- Backup lockpicks and oil/grease for control.
(There are exceptions depending on your party — a druid in Wild Shape can sometimes skip a lot of gear.)
Quick walkthrough — the chestnuts
Start with a scout or your highest Sleight of Hand. Use Examine to find visible traps; there are usually tripwires and pressure plates near the entrance. Move in turn-based mode if the traps bother you — it slows the pace, but it reduces surprises.
- Scout entrance and mark traps.
- Disarm traps in order of threat.
- Move inside slowly and keep healing ready.
// Lever puzzle I used
Left -> Middle -> Right -> Middle
// Pull wrong and someone gets hurt.
When you free the victim, escort them out. If you rush, you’ll trigger leftover hazards. Oddly enough, patience often wins fights before rolls do.
Combat tips ⚔️
Expect reinforcements if alarms ring. Position your toughest character at chokepoints. I prefer crowd-control spells over big explosions here; Fireball will endanger the captive. Use Web, Grease, or Sleep to limit numbers without collateral damage.
- Put a tank in the doorway.
- Use ranged cover for archers.
- Reserve healing slots for sudden bursts of damage.
Controversial take: sometimes avoiding combat entirely (bribe or bluff) is smarter for the long term — saves resources and avoids annoying alignment checks later. There, I said it!
Rewards, consequences, and the why behind them
Succeed and you usually get XP, goods, and better standing with locals; fail and you’ll lose options later. Why does this matter? Because BG3 threads earlier choices into later acts. We found that saving someone perfectly can unlock merchant chances or a later ally scene; failing can close those doors.
| Outcome | XP | Gold | Impact |
|---|---|---|---|
| Perfect Rescue | 350 XP | ~100g | Stronger reputation |
| Standard Rescue | 250 XP | ~75g | Minor benefits |
| Failed | 50 XP | 0g | Reputation loss |
Warning: if the victim dies, some merchants and quests may lock off. This doesn’t always happen exactly the same way for every playthrough — it depends on your party and previous choices.
Dialogue and alternatives 💬
You don’t have to fight. High Charisma can buy a negotiation or intimidation route (Persuasion/Intimidation checks). Disguise or deception works when you’ve got the spells or items to back it up. I’ve used bribery to avoid a bad fight and later regretted spending the coin — again, it depends on your niche and goals!
- Deception: disguise and bluff.
- Intimidation: force them to leave.
- Bribe: immediate but costly.
Stealth players can find a basement entrance (lockpick and Perception checks needed). A wizard with Knock can open some doors; druids in animal form can sometimes bypass weight-based triggers.
“If you’re low on resources, think twice before the heroic charge.” — on-the-ground advice
Oddly enough — one counterintuitive insight
If your goal is long-term loot and allies, sometimes leaving the victim alive but injured (or even staged as dead) creates better narrative hooks later. Controversial? Yes. Useful? In several runs, yes.
Short note: save often. Reloading after a disaster taught me more than a flawless run. It’s not cheating; it’s experimenting. Between us, that’s half the fun.
Good luck, adventurer! 🎲 (Also — check the windmill first. Seriously.)