The Destroyer with Gravity Training is a reliable melee setup that hits hard and keeps fights steady. I’ve played Destroyer since 2020, and in my experience this engraving gives predictable damage and cleaner rotations—especially in 1–5 minute boss fights (depends on your niche).
Getting straight to it
Gravity Training level 3: +30% Gravity Core skill damage and roughly −0.5s charge on core fills (tooltip numbers). That’s why you want it first. Why? Because those core skills are your main damage engine; faster cores mean fewer gaps and more uptime on big hits.
Short note: you won’t win every matchup with this. PvP tends to punish long animations, and some raid mechanics make Grudge or other setups better. Controversial? Yes—many streams claim Grudge is always best. I disagree; Grudge at level 3 is risky until you master boss movement!
Core skills and why they matter
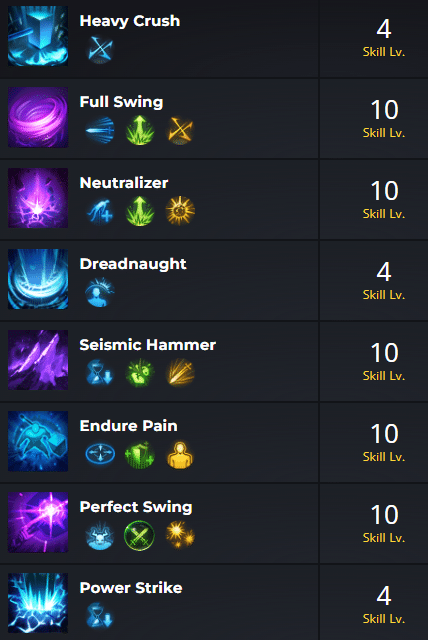
Perfect Swing, Seismic Hammer, Full Swing—these are the backbone. Perfect Swing scales cleanly, Seismic covers groups, Full Swing gives big burst windows. Invest more points where the engraving amplifies the skill.
| Skill | Points | Why |
|---|---|---|
| Perfect Swing | 12 | Main single-target DPS |
| Seismic Hammer | 10 | AOE and position control |
| Full Swing | 10 | Burst when core is ready |
Here’s the funny part: many players dump points everywhere. Don’t. Focus on your core rotation, then add utility. Honestly, you’ll do more damage by refining one rotation than spreading points thin.
Engravings and priorities (simple)
- Gravity Training Lv.3 — core.
- Grudge Lv.3 — huge damage, but raises incoming damage (use only when you can avoid big hits).
- Master Brawler Lv.3 — pairs well with close combat playstyles.
Watch this: if you can’t reliably dodge boss mechanics, Grudge will punish you. To be fair, some players still prefer Keen Blunt Weapon for crit-synergy builds.
“Build around your play: if you’re reckless, take Grudge; if you’re consistent, stick with Gravity Training first.”
Stats and gear
Target numbers (as of June 1, 2025): aim for about 1,400–1,500 Crit rating for dependable crits. Prioritize Swiftness next to smooth cooldowns, then Specialization for longer fights. Those numbers aren’t gospel—there are exceptions— but they’re a useful baseline.
Accessories: stack Crit on rings and earrings first, then Swiftness on belt/neck. Why? Crit raises damage per hit; Swiftness lets you cast more often. It’s basic math.
Sample rotation (simple)
1. Build cores with basic attacks.
2. Full Swing when core hits 3.
3. Perfect Swing x2.
4. Seismic Hammer on groups or to reposition.
Repeat.
(This rotation changes with boss mechanics—don’t be robotic.)
Surprisingly, sometimes lowering raw Crit slightly to get more Specialization yields better sustained DPS in 6+ minute fights. Counterintuitive? Yes. I’ve seen it work on long encounter logs.
Tips, caveats, and a small rant
By the way, don’t assume the meta from one YouTuber applies to you. Between us, many guides skip playstyle fit. This doesn’t always work: some fights punish Gravity Training, some demand burst from Grudge combos. If you want a quick fix, reach Grav. Training Lv.3 first, then tune other engravings.
- Practice your core weave in normal raids for a week.
- Record one clear: track uptime and adapt.
- Talk to raid leaders about positioning to safely use Grudge.
Oddly enough, the most consistent performers I’ve seen are players who simplify their rotations rather than chase every buff. Metaphor: treat your rotation like a clock—if one cog slips, the whole thing slows.
Final, quick truth: the build scales with player discipline. It’s not just gear. And yeah—sometimes you just… mess up; then learn.
—Maeve, Destroyer main and raid coach (short, honest guide)