I play Whirlwind Barbarian a lot, and I’ll keep this short and practical. The build is a mobile cyclone that clears packs fast and keeps you moving. I’ve noticed it’s one of the easiest solo farmers to learn and scale into endgame play if you invest in the right gear and gems. Honestly, it won’t work the same if you try to treat it like a single-target burst class.
🌪️ What Whirlwind Does
Whirlwind turns you into a moving area-of-effect machine. You spin, you do consistent hits per second, and you move through groups instead of stopping to fight. That matters because movement equals uptime: more hits, more loot, faster rifts. In my experience, the simple loop of spin → reposition → spin is what makes this build reliable.
Why choose it? Because it’s self-sustaining for long farm runs, and it needs less precise rotations than other builds. We found you can clear dense zones faster while using fewer buttons, which reduces fatigue during multi-hour sessions.
⚔️ Skills and Why They Matter
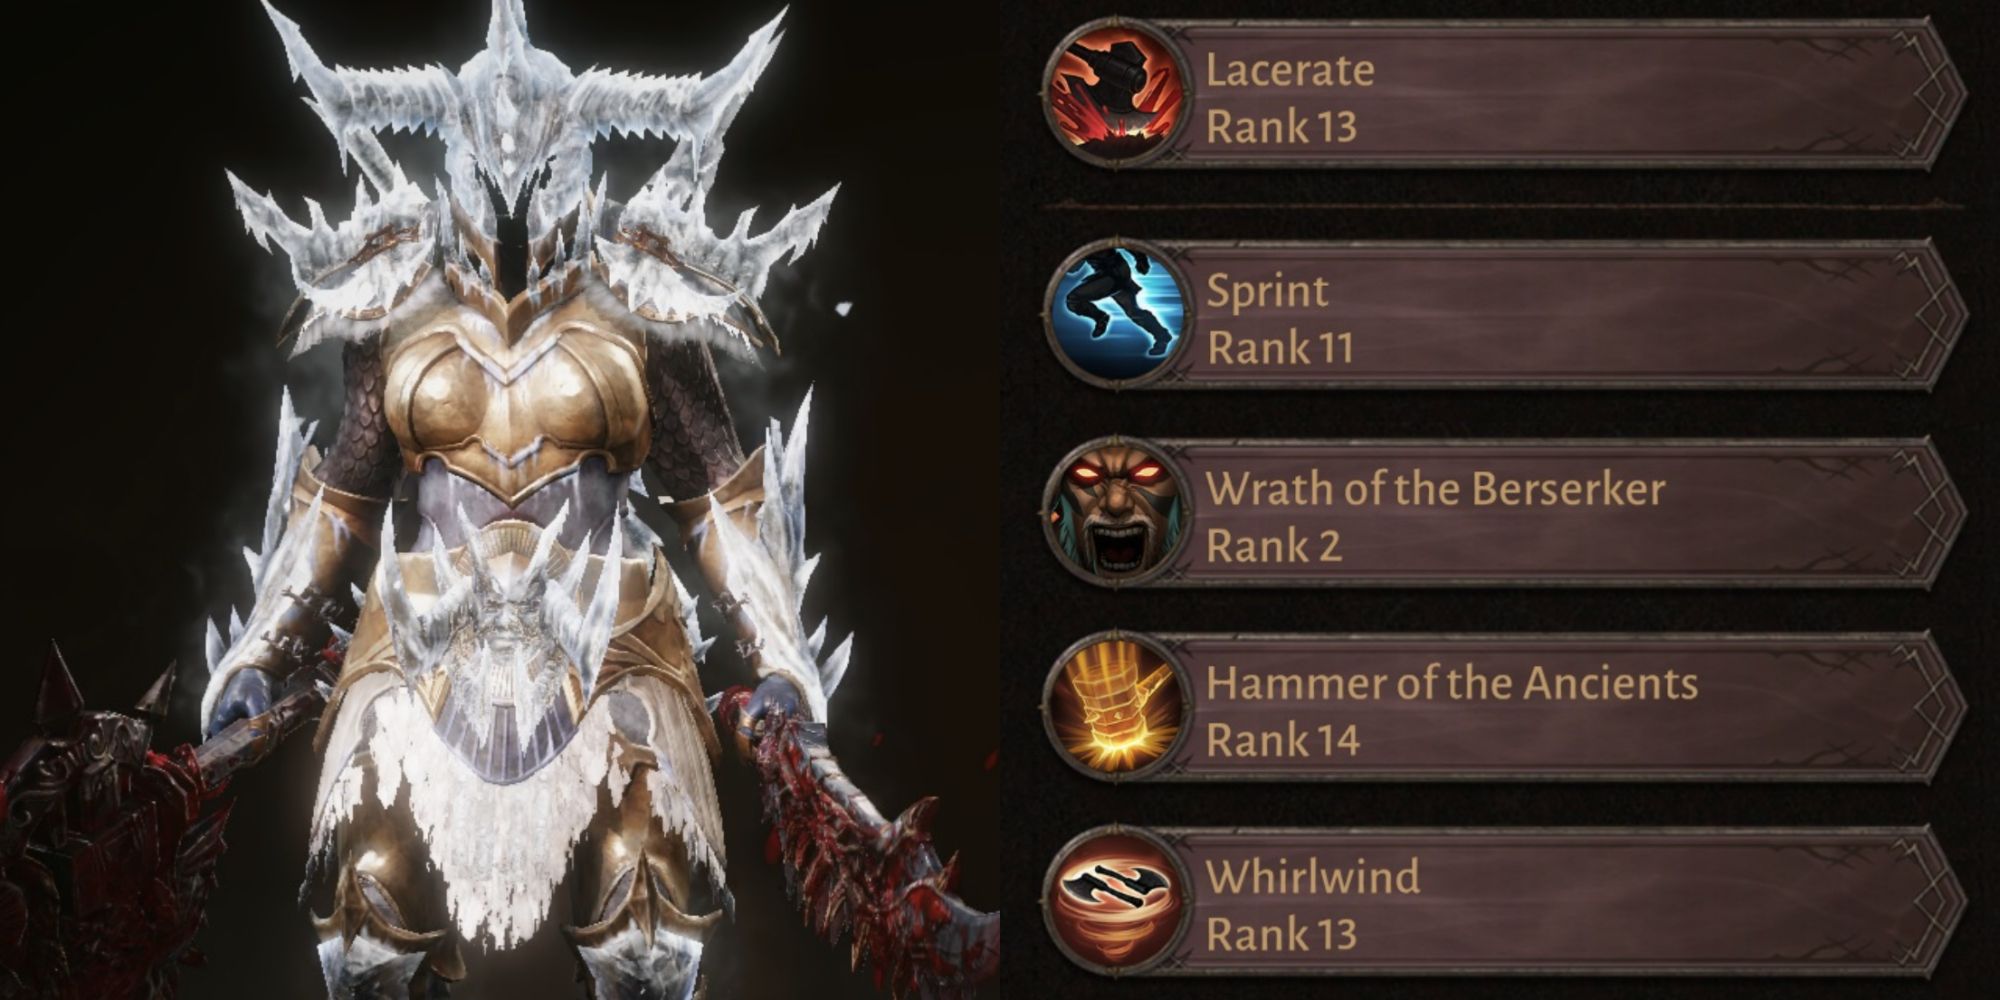
Max Whirlwind first. It’s the damage engine. After that prioritize movement and Fury generation so you can keep spinning. I use Sprint to reposition and Furious Charge to top up Fury. Wrath of the Berserker is for heavy packs or elites—save it for those windows.
Quick skill priority (a practical order, not gospel):
- Whirlwind (core damage)
- Sprint (mobility)
- Furious Charge (Fury and repositioning)
- Wrath of the Berserker (burst for elites)
- Ground Stomp (crowd control)
- Undying Rage (oh-shit survival)
Example rotation? Sprint to a pack, pop Wrath if it’s a big elite, start Whirlwind, use Furious Charge to refill Fury and reposition, stomp if things get spicy. Repeat. It’s that simple (this doesn’t always work—depends on mob types and layout).
// pseudo-rotation for practice
Sprint -> Wrath -> Whirlwind (3-4s) -> Furious Charge -> Whirlwind -> Ground Stomp (if needed)
🛡️ Gear — what to hunt and why
Two-handed weapons are my pick because they bump raw damage per swing, which scales well with Whirlwind’s repeated hits. Attack speed matters too because more hits means more procs and higher gem scaling. Prioritize All Damage and Critical Hit Chance on main pieces, then Crit Damage and Attack Speed.
| Slot | Primary | Secondary |
|---|---|---|
| Weapon | Damage, Crit Chance | Attack Speed, Crit Damage |
| Helm | All Damage, Life | Movement Speed |
| Chest | All Damage, Armor | Life |
| Boots | Movement Speed | Life |
| Legs/Shoulders | All Damage | Armor, Crit Damage |
Specificity matters: a 24% attack speed roll is worth chasing if your weapon already has high base damage. Why? Because that percent multiplies your hit count during Whirlwind and increases gem procs.
💎 Gems — which to level first
I rank gems by consistent value for farming. Berserker’s Eye is usually top because it scales strongly with repeated hits (works great with crit). Blood-Soaked Jade helps your map speed after kills. Everlasting Torment adds steady DoT for prolonged clears.
Tier list (practical focus):
- S-tier: Berserker’s Eye, Blood-Soaked Jade, Everlasting Torment, Lightning Core
- A-tier: Cutthroat’s Grin, Ca’arsen’s Invigoration
- B-tier / situational: Bottled Hope, Chip of Stoned Flesh, Unity Crystal
Upgrade priority: concentrate materials on S-tier first (aim for ranks 3–5), because a rank 4 Berserker’s Eye will outpace multiple rank 1 situational gems.
📊 Combat flow and positioning
Start by scouting a pack and choosing a path through it. Sprint into position, start Whirlwind so you rotate through the densest cluster, charge to refresh Fury or to snag another cluster, and engage elites with Wrath windows. Predictive positioning (anticipating spawns) matters; it cuts down wasted movement.
Common mistakes I still see: spinning alone in empty rooms, chasing single targets while a spawn cluster waits, or ignoring cooldowns on your burst tool when elites pop. These errors cost time and materials—don’t do them often.
🎯 Best farming spots (practical picks)
Good spots have high enemy density, clear paths for spinning, and minimal hazards. From my runs, Library of Zoltun Kulle works very well because corridors funnel mobs. Frozen open zones with dense spawns also pay off if your gear is high enough.
| Location | Why it works | When to go |
|---|---|---|
| Library of Zoltun Kulle | Wide corridors, predictable spawns | Weekends or bonus XP events |
| Frozen Tundra | Open spaces, high loot potential | After you reach high gear score |
| Ancient Arena | Fast rotations, elite spawns | Daily boss resets |
Pro tip: time your sessions with in-game bonuses. Between us, a two-hour block during a double XP window beats random playtime.
⚡ Advanced tweaks and one weird insight
Animation cancelling is real: canceling Whirlwind’s tail with Sprint or Charge tightens your rhythm and saves Fury. Predicting spawns is less flashy but gives the biggest returns. Oddly enough, sometimes slightly slower attack speed with much higher base damage outperforms a fast weapon if your gems scale with crit hits—counterintuitive, I know.
One controversial take: Whirlwind is overrated for solo boss killing. You’re better off using highly specialized single-target setups for boss farms. Some players will disagree—fight me in chat, I’ll defend it.
“Spin smart, not just fast. Positioning wins more than button-mashing.” — practical advice
Common formula I use (rough): Whirlwind costs ~10 Fury/sec, Furious Charge gives ~15 Fury per cast. So plan one Charge every 8–10 seconds of sustained spinning (your mileage may vary).
There are exceptions to every rule; some maps will punish spinning and force you to play differently. To be fair, that’s part of the fun.
Want a final quick checklist? Here—short and useful:
- Max Whirlwind, then mobility and Fury tools.
- Prioritize All Damage and Crit on gear.
- Level S-tier gems first.
- Practice animation cancels for smoother loops.
- Pick dense, spin-friendly routes.
Surprisingly, practice beats theory: go run a few two-hour sessions and tweak gear/gems afterward. I’ve learned more from those hours than from reading forums. Try it this week (maybe on March 28, 2025?) and you’ll see the difference—then adjust.
Oh, and one last stumble—sometimes I forget to pick up a loot pile when I’m focused on route efficiency. It happens. You’ll laugh about it later.